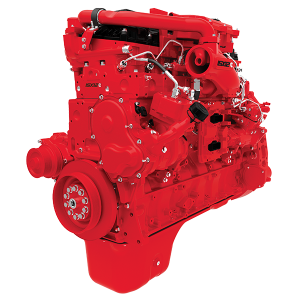
If you own or maintain a vehicle powered by the Cummins ISF3.8 diesel engine, you already know its reputation for reliability and performance. However, like any engine, it requires periodic maintenance. One of the most crucial services is replacing the timing kit.
In this article, we’ll show you how to replace the timing kit step-by-step. Moreover, we’ll explain when to do it, why it matters, and what tools you’ll need to complete the job safely and effectively.
Why Timing Kit Replacement Matters
Over time, the timing components such as the gears, tensioner, and chain can wear out. As a result, engine timing can shift, leading to performance issues or even catastrophic engine damage. Fortunately, replacing the timing kit in time helps prevent this.
Transitioning to the symptoms, here’s how you can tell if your ISF3.8 timing kit might need attention.
Signs You Need a New Timing Kit
Watch for these common signs:
- Ticking or rattling noises near the timing cover
- Engine misfires or rough idle
- Reduced power or fuel efficiency
- Oil leaks from the front of the engine
If any of these occur, you should inspect the timing components as soon as possible.
When Should You Replace It?
Generally, Cummins recommends inspecting and possibly replacing the timing kit every 150,000 to 200,000 kilometers (or 90,000 to 125,000 miles), depending on usage conditions. In high-stress environments, it may be necessary to replace it sooner.
What You’ll Need for the Job
Before beginning, gather the following tools and parts:
- A complete ISF3.8 Timing Kit (timing gears, tensioner, guide, seals, etc.)
- Torque wrench and socket set
- Screwdrivers and pry tools
- Engine locking tools
- Oil drain pan
- New engine oil and coolant
- Clean rags and engine-safe sealant
Now that you have everything ready, let’s move on to the actual process.
Step-by-Step Cummins ISF3.8 Timing Kit Replacement
Step 1: Preparation and Safety
First and foremost, make sure the engine is cool and the vehicle is parked on level ground.
- Disconnect the battery to prevent any electrical accidents.
- Drain the engine oil and coolant into suitable containers.
- Remove the engine covers and any components blocking access to the timing cover.
Step 2: Remove the Timing Cover
Next, take off the accessory belts, fan assembly, and pulleys.
- Carefully remove the timing cover bolts and take off the cover.
- Be gentle, as you’ll want to avoid damaging the sealing surface.
At this point, you’ll be able to see the timing gears and tensioner.
Step 3: Align the Timing Marks
Before removing anything, rotate the crankshaft slowly until the timing marks on the camshaft and crankshaft gears are perfectly aligned.
- This is critical. If these marks are off during reinstallation, engine timing will be incorrect.
- Use locking tools to hold the crankshaft and camshaft in position.
Once locked, you can move on to the next step with confidence.
Step 4: Remove Old Timing Components
Now, loosen and remove the tensioner, timing gears, and chain or belt.
- Inspect each part for wear or damage.
- If you notice cracks, worn teeth, or weak springs, it’s good you’re replacing the entire kit.
Step 5: Install the New Timing Kit
With the old components removed, it’s time to install the new ones.
- Begin by positioning the new gears, aligning them with the timing marks.
- Install the new tensioner and guide rail.
- Apply torque to each bolt based on the specifications in the Cummins service manual.
At this stage, double-check the alignment of the timing marks. If everything lines up, proceed to reassembly.
Step 6: Reassemble the Engine
After installing the new timing kit, clean the timing cover thoroughly.
- Apply a fresh bead of engine-safe sealant and reinstall the cover.
- Reattach the fan, belts, pulleys, and any removed accessories.
- Finally, refill the engine oil and coolant to the recommended levels.
Step 7: Test and Inspect
Now that everything is reassembled:
- Reconnect the battery.
- Start the engine and let it idle.
- Listen for unusual noises and check for leaks.
- Take the vehicle for a short test drive to ensure smooth operation.
Additional Tips
While you’re working on the timing system, consider replacing:
- Water pump – Often driven by the timing components
- Front oil seal – Easy to change while the timing cover is off
- Drive belts – If they show signs of wear
Doing this will save labor costs and reduce future downtime.
Final Thoughts
To summarize, replacing the Cummins ISF3.8 timing kit is a task that demands attention to detail, but it’s entirely doable with the right tools and patience. By following the steps above, you’ll ensure your engine continues to perform reliably and efficiently.
If you’re looking for a high-quality ISF3.8 timing kit, make sure to buy from a trusted supplier. OEM or premium aftermarket kits provide the durability needed for heavy-duty performance.