When rebuilding a Cummins engine, few tasks are as critical as installing a piston kit correctly. Precision during this process directly impacts engine performance, fuel efficiency, compression, and longevity. From preparation to break-in, each step must be handled with care to avoid costly mistakes and mechanical failures.

Why Proper Piston Kit Installation Matters
Pistons are at the heart of engine operation. Their role in compression, combustion, and exhaust cycles demands precise installation. Improperly fitted pistons or rings can lead to:
- Oil blow-by
- Excessive smoking
- Poor fuel efficiency
- Loss of power
- Premature engine wear or seizure
By following proper procedures and using quality parts, it’s possible to restore the engine to factory-level performance—or better.
Step-by-Step Guide to Installing a Cummins Piston Kit
1. Identify the Correct Piston Kit
Before starting, confirm your engine’s model, serial number, and configuration. Cummins engines—such as the 6BT, ISX, QSB, or N14—may have different piston designs, ring sizes, and compression ratios. Choosing the correct piston kit ensures a perfect fit and optimal performance.
Checklist before purchase:
- Engine model and CPL (Control Parts List)
- Bore size (standard, oversize, or undersize)
- Compression ratio
- Pin diameter and length
- Ring set type (steel, chrome, moly, etc.)
2. Disassemble the Engine
With the engine removed or accessible:
- Disconnect the battery
- Drain the oil and coolant
- Remove the cylinder head, oil pan, and connecting rod caps
- Carefully push the old pistons out from the top
- Label each connecting rod and cap to ensure correct reassembly
While disassembling, inspect components for wear or damage. Scored cylinder walls, worn crankshaft journals, or cracked pistons should be addressed before proceeding.
3. Clean and Inspect Cylinder Bores
Thorough cleaning is essential. Use a ridge reamer if needed to remove carbon buildup at the top of the cylinder. Then, hone the cylinder walls to restore crosshatch patterning, which aids in oil retention during piston ring break-in.
Measurements to verify:
- Cylinder bore diameter and taper
- Out-of-roundness
- Piston-to-wall clearance
If measurements are outside tolerance, cylinder boring or resleeving may be required before installing new pistons.
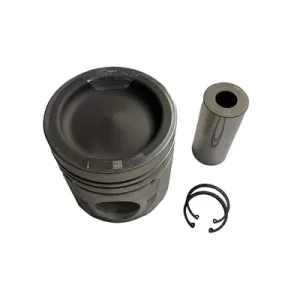
4. Assemble the Pistons and Connecting Rods
If your piston kit doesn’t come pre-assembled:
- Press-fit or floating wrist pins to connect the rods to the pistons
- Align markings (usually front-facing indicators) on pistons and rods
- Install circlips or retainers securely if using floating pins
- Use engine assembly lube on pins and wrist pin bushings
5. Install the Piston Rings
Piston rings must be installed with attention to detail. Each ring—compression, scraper, and oil control—has a specific location and orientation.
Tips:
- Use a piston ring installer to avoid ring damage
- Stagger ring gaps at 120° intervals to prevent compression leaks
- Measure and file the end gaps if necessary using a feeler gauge
- Check side clearance with the ring in the groove to ensure proper fit
Most Cummins engines have markings like “TOP” on the compression rings. Always follow the included instructions for ring orientation.
6. Lubricate and Insert Pistons into Cylinders
Apply engine assembly lube to:
- Piston skirts
- Rings
- Cylinder walls
- Rod bearings
Use a piston ring compressor to compress the rings, then gently tap the piston into the cylinder using a wooden dowel or hammer handle. Ensure the connecting rod aligns smoothly with the crankshaft journal.
7. Install Connecting Rod Caps and Torque to Spec
Once the piston is in place:
- Install the rod cap with matching alignment
- Tighten the bolts in stages
- Use a torque wrench to follow Cummins factory specifications
- Check rod side clearance and rotation to ensure smooth movement
Torque specs vary depending on the engine model, so always consult the Cummins service manual for accuracy.
8. Reassemble the Engine
With all pistons installed:
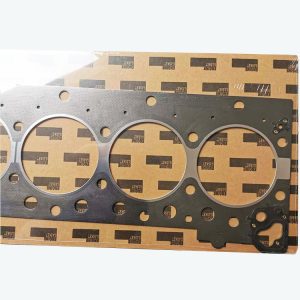
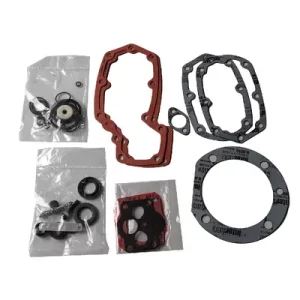
- Replace the oil pump, gaskets, and seals
- Install the oil pan and cylinder head
- Torque head bolts in the correct sequence and in multiple stages
- Reconnect the fuel system, sensors, coolant hoses, and wiring harnesses
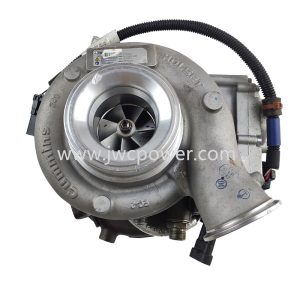
Take the opportunity to replace other wear parts such as timing components, injectors, or seals if necessary.
9. Prime the Oil System and Start the Engine
Before starting:
- Add new engine oil and coolant
- Prime the oil pump or crank the engine without fuel to build pressure
- Check for leaks or abnormal noises during the first start
- Monitor oil pressure and temperature readings
10. Follow a Proper Break-In Process
Avoid full throttle, high RPM, or idling for extended periods during the first few hours. Load variation is beneficial for piston ring seating. After 500–1000 km (or as specified), change the oil and inspect filters for metal particles or debris.
Maintenance Tips After Installation
To extend the life of your rebuilt Cummins engine:
Use high-quality oil and filters
Follow OEM maintenance intervals
Monitor exhaust color, fuel consumption, and oil pressure regularly
Avoid overheating and overloading the engine
Conclusion
Installing a Cummins engine piston kit isn’t just a mechanical task—it’s a precision job that, when done right, delivers lasting performance and reliability. Every detail matters, from correct ring gaps to torque specs. Whether you’re working on a 6BT in a pickup or an ISX15 in a heavy-duty truck, following this comprehensive guide helps ensure your rebuild is a success.